
Plushies, oh, they're more than just stuffed toys; they're confidants, cuddle buddies, and sometimes, a treasured part of our childhood memories. From the fluffiest stuffed animals to the quirkiest character plush, these soft companions can gather dust, dirt, and the occasional spill. Knowin' how to clean and repair them properly means they can stick around for all the adventures yet to come. It ain't just about makin' 'em look good; it's about keeping them hygienic and structurally sound, especially if they're loved by little ones. This guide is gonna walk you through everything from a quick spot clean to more involved repairs, ensuring your plush pals stay huggable for years. We'll touch upon different methods because, let's face it, not all plushies are made the same, and some need a lil' extra care.
Gentle TLC for Delicate Friends: Cleaning Your Pastel Daisy Cushion and Similar Treasures
So, you've got a super delicate plushie, maybe somethin' like a beautiful Pastel Daisy Cushion needing gentle cleaning? These kinds of plushies, especially those with soft pastel colors or delicate embroidery, need a really gentle touch. You don't wanna go dunkin' them in a washing machine, no sir.
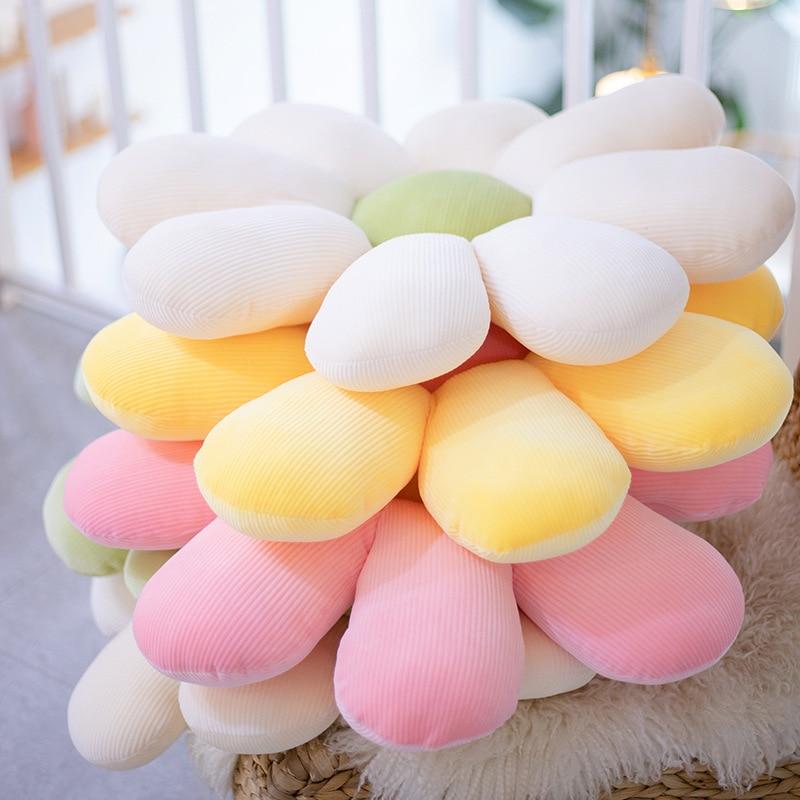
How can I clean my delicate plush without damaging it?
Well, the key here is gentle surface cleaning. First up, grab two bowls. In one, put a bit of slightly cold water and a teensy drop of delicate laundry detergent – the kind you'd use for wool or silk. In the other bowl, just plain cold water. Now, take a clean, soft rag (microfiber is great for this), dip it into the soapy water, and wring it out really, really well. You want it damp, not soakin' wet. Gently dab or wipe the soiled spot on your plushie. Don't scrub hard, or you might mess up the fabric or fuzz up the fur. After you've treated the spot, take another clean rag, dip it in the plain water, wring it out, and gently wipe away any soap residue. You might need to repeat this a couple times to make sure all the soap is gone. The trick is to work spot by spot, rather than trying to clean the whole thing at once, to avoid gettin' the plushie too wet. If you're worried about color bleeding, especially on a multi-colored friend, always test the soapy water on a hidden spot first, like an inner seam. Let it dry and see if any color comes off. If it does, you might need to stick to just plain water or an even more specialized cleaner. For general dust, a soft brush or even the upholstery attachment of your vacuum on a low setting can work wonders. This method ensures your plush stays soft and its colors vibrant, just like those adorable items you can explore in this guide to plushie types.
Tackling Grime on Gourmet Buddies: Spot Cleaning Your Stuffed Tuna Sushi Pillow
It’s a fact of life, especially with cuddly food plushies, that they might end up with a bit of real food on 'em. Picture this: your adorable Stuffed Tuna Sushi Pillow requiring spot cleaning for food stains has had a close encounter with some actual soy sauce or a sticky fingerprint. Panic? Nah, we got this.
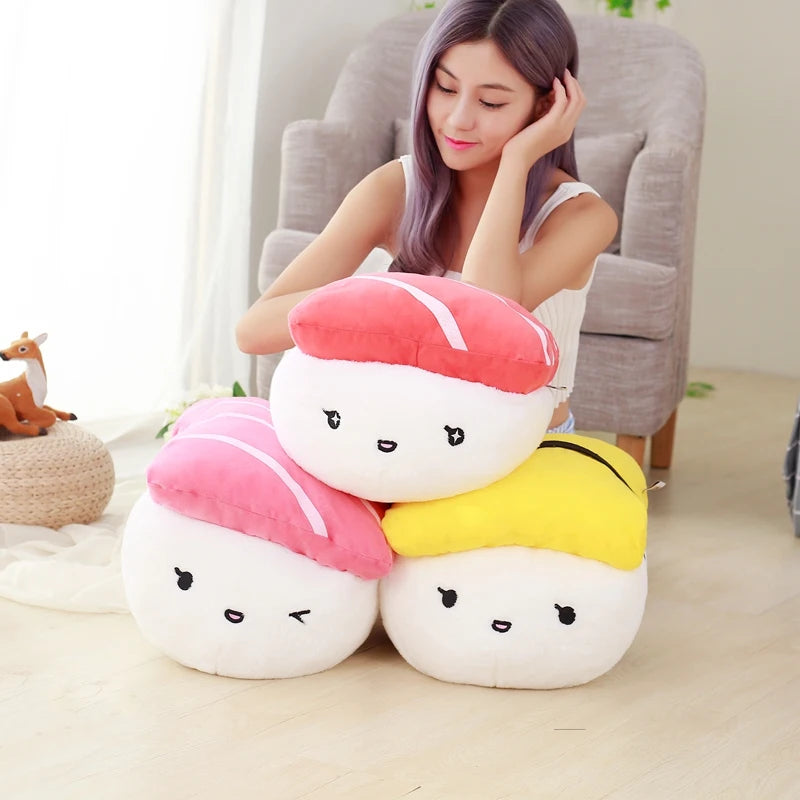
What's the best way to get a food stain out of a food plushie like my sushi pillow?
Speed is kinda your best friend here. The quicker you get to a stain, the easier it's gonna be to remove. For most food stains on plushies, the gentle spot cleaning method we talked about earlier is still your go-to. A little bit of delicate detergent mixed with cold water, applied with a damp cloth, is often enough. But what if it’s something specific? For greasy stains, like if a bit of buttery popcorn landed on your plushie pizza slice, you might find that a tiny dab of mild dish soap (the kind that's good at cutting grease) can be more effective than laundry detergent. Again, use it sparingly and test on an inconspicuous area first. After dabbing the stain, always rinse by dabbing with a clean cloth dipped in plain water. For sugary stains, like a drop of juice, cold water alone might do the trick if you get to it fast. The key is to blot, not rub. Rubbing can spread the stain and damage the plush fabric. If it’s a more stubborn stain, you might need to repeat the process a few times. Patience is a virtue when it comes to plushie stain removal! Once the stain is gone, let the area air dry completely. You can use a hairdryer on a cool, low setting to speed things up, but don't get it too close or use hot air, as that could damage synthetic fur. Proper care ensures your collection of yummy-looking friends stays fresh and inviting.
The Big Soak: Deep Cleaning Leafeon Sylveon Plush Toys by Destuffing
Sometimes, a surface clean just ain't gonna cut it. Maybe your favorite Leafeon Vaporeon Glaceon Sylveon Plush Toys that might need destuffing for deep cleaning took a tumble in the mud, or perhaps an older plush has gotten that overall dingy look and musty smell. For these situations, a deep clean by destuffing can work wonders. It's a bit more involved, but the results can be amazing, especially for those best plush animal toys that have seen a lot of love.
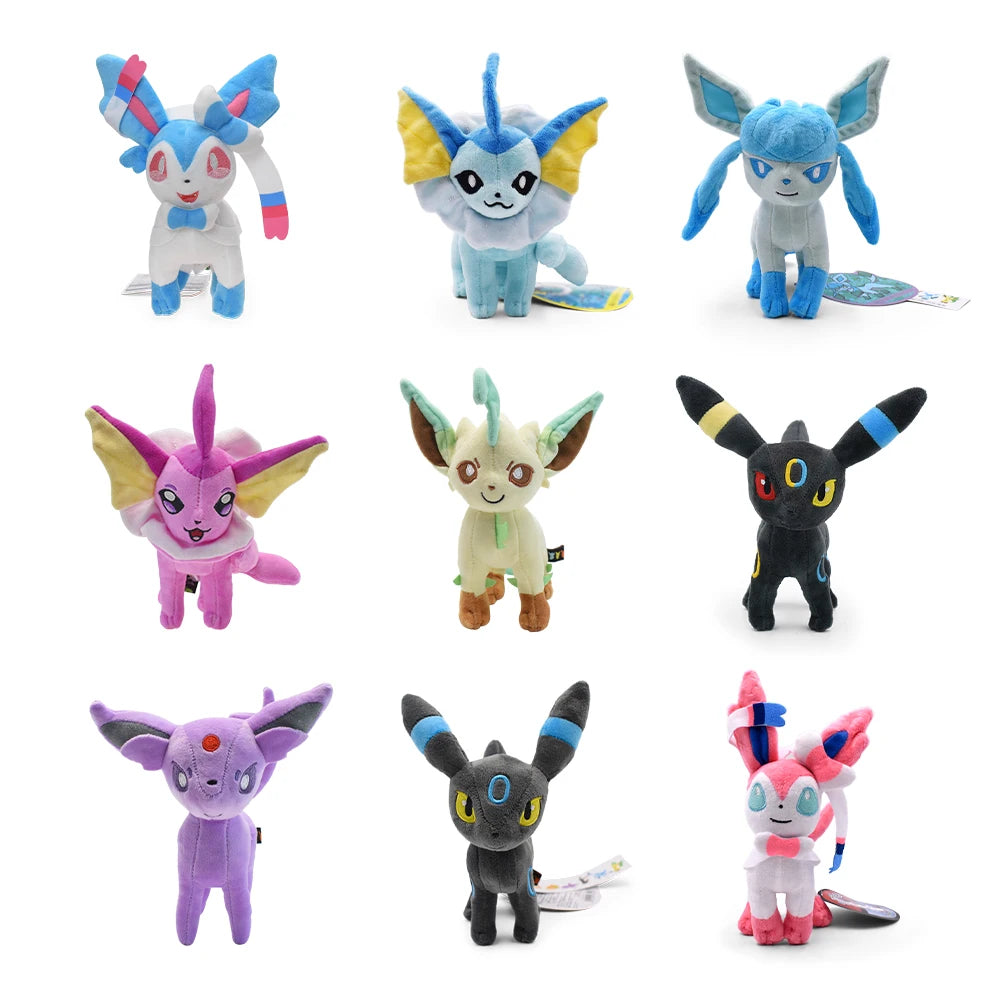
My large or complex plush is really dirty; can I give it a deep clean?
Yes, you absolutely can! Destuffing sounds scary, but it's often the best way to thoroughly clean a plushie without damaging its shape or inner workings (if any, though we'll cover electronics separately). Here’s how you go about it: First, you need to find the seam where the plushie was likely closed up after stuffing. This is often a slightly rougher or looser thread compared to the main construction seams, usually along the back or under an arm or leg. Carefully, using a seam ripper or small, sharp scissors, open up a few inches of this seam – just enough to get the stuffing out. Next, gently remove all the stuffing. It's a good idea to put this stuffing into a clean bag or pillowcase, especially if you plan to reuse it. If the stuffing is very old, clumpy, or smelly, you might consider replacing it with new hypoallergenic polyester fiberfill, which is readily available at craft stores. Now, take the empty plush "skin." You can hand wash it in a basin of cool water with a gentle detergent. Let it soak for a bit if it's particularly grimy. Swish it around gently, then rinse it thoroughly with cool, clean water until all the soap is gone. Be careful not to wring it too harshly; gently squeeze out the excess water. To dry the skin, you can roll it in a clean towel to absorb more moisture, then lay it flat or hang it up to air dry completely. Avoid direct sunlight, which can fade colors. Make sure it's 100% dry before restuffing to prevent mildew. Once dry, it's time to restuff! If you're using new stuffing, fluff it up a bit before putting it in. Start with the extremities – paws, ears, tail – and work your way to the main body. Try to distribute the stuffing evenly to avoid lumps and to restore your plushie's original shape. Don't overstuff, or it might strain the seams. Finally, sew up the opening using a ladder stitch (also called an invisible stitch). This stitch, when done correctly, will make your repair almost impossible to see. There are many great tutorials online if you're not familiar with it. This whole process, while a bit time-consuming, is incredibly rewarding and can make a beloved plushie look and smell like new again. If you're feeling adventurous, you might even get inspired by some DIY plushie making at home techniques!
Stitching in Time: Expert Repairs for Gengar Plush Toys and Character Favorites
Oh no! Your cherished Gengar Plush Toys representing character favorites needing expert repair has sprung a leak, or maybe another one of your favorite animal plush pals has a loose limb. Don't despair! With a few basic sewing skills, you can often perform miracles and get them back to their huggable selves. A little tear doesn't mean it's the end for your spooky or cuddly companion.
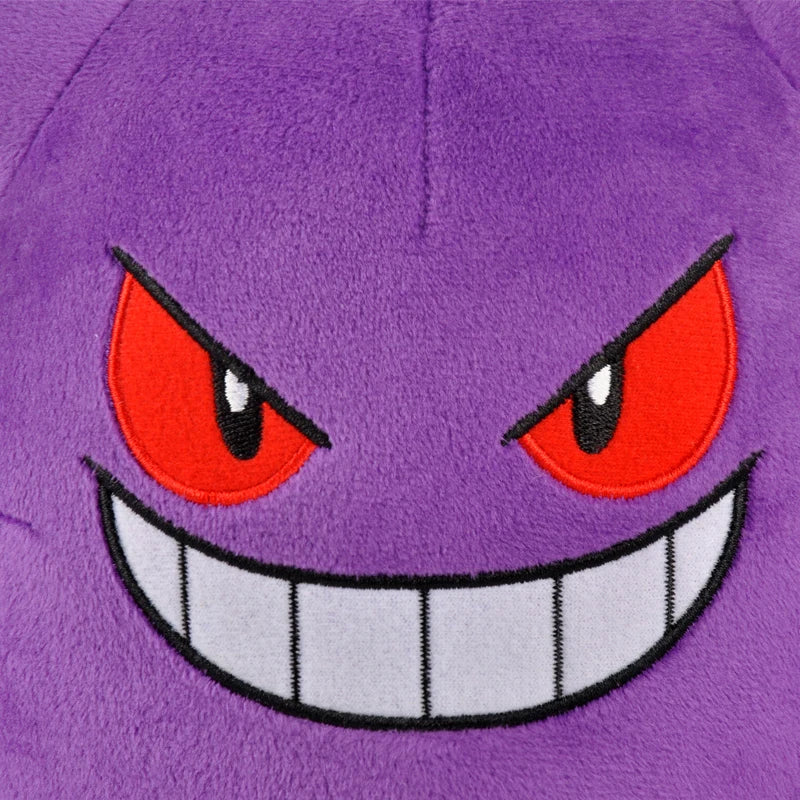
My Gengar's ear is loose! How do I sew it back on neatly?
That's a common plushie predicament! The key to a neat repair, whether it's an ear, a limb, or just an open seam, is using the right technique and materials. First, get yourself a needle and thread that closely matches the color of your plushie's fur or fabric. This will help make your stitches less noticeable. If the plushie is fluffy, you might even be able to hide the stitches completely within the fur. For open seams or reattaching parts like Gengar's ear, the ladder stitch (or invisible stitch) is your absolute best friend. To start, thread your needle and knot the end. If you can, start your stitch from the inside of the plushie to hide the knot. If you're reattaching a limb, position it carefully where it belongs, maybe even using a few pins to hold it in place if the part is large. The ladder stitch involves taking small, straight stitches on one side of the opening, then directly across on the other side, alternating back and forth. Imagine the stitches forming the rungs of a ladder. As you pull the thread taut (but not too tight!), the seam will magically close up, and your stitches will disappear into the fabric. It’s quite satisfying to watch! When you reach the end of the tear or have gone all the way around the base of the ear, make a few small securing stitches and tie off your thread, again trying to hide the knot if possible, perhaps by pushing the needle through the fabric and snipping the thread close. If you're dealing with safety eyes or noses that have fallen off, you might be able to sew them back on securely. If the post is broken, you can sometimes find replacements at craft stores, or you can get creative and embroider new eyes or a nose using embroidery floss, which is also great for restitching worn mouths or other facial features. Taking your time and using these careful techniques will ensure your plushie repairs are strong and look as good as new.
Restoring Feathery Charm: Advanced Repairs for Your Kiwi Bird Plush Toy
Sometimes our plush friends need a bit more than a simple stitch. Perhaps your unique Kiwi Bird Plush Toy, a delicate item needing advanced restoration, has seen better days, with a droopy wing or faded feathers. Or maybe another beloved bird plush has suffered a more significant tear. These situations call for some advanced repair techniques to bring back their former glory.
My vintage bird plush has faded and a wing is droopy, what can I do?
Don't fret, even these more challenging issues can often be addressed with a bit of patience and creativity! For sagging limbs or wings, like on your Kiwi bird, you might need to add some internal support. If the plushie can be (or already is) destuffed, you can insert flexible wire (like pipe cleaners or craft wire, ensuring ends are curled to avoid poking through) or even lightweight plastic tubing into the limb to give it structure. You might need to sew small pockets inside the limb to hold these supports in place or carefully stitch around them once the plush is restuffed. For poseable plushies, sewing little pockets inside and adding extra foam or batting in specific areas can help restore their shape. If you have a deep tear, especially in an area that gets a lot of stress, simply stitching it might not be enough. Consider patching it. You can use a complementary fabric, or even a decorative one, to cover the tear. For durability, it's a good idea to use an inner lining patch first, stitching it to the inside of the tear, and then applying the outer patch. Fabric glue can sometimes be used in conjunction with stitching for extra reinforcement, especially on non-fluffy fabrics, but always test it first as it can stiffen the material. Now, for faded colors – this can be tricky, but not impossible. Fabric dye is an option for restoring an all-over faded color. However, this is a more advanced technique and absolutely must be tested on a very small, hidden patch of the plushie first, as different fabrics react differently. Follow the dye instructions meticulously. For smaller areas or to enhance features like eyes or noses, fabric paint can be used. Again, test first and apply sparingly with a fine brush. It's all about careful application and understanding the materials you're working with. These advanced repairs can seem daunting, but successfully restoring a cherished plushie is incredibly rewarding.
Handle with Care: Cleaning Electronic Wonders like the Marvel Avengers Dancing Cactus
Electronic plushies, like the super fun Marvel Avengers Dancing Cactus Electronic Spider-Man Toy needing special care for electronics, present a unique cleaning challenge. They sing, they dance, they light up – but they definitely don't like water! So, how do you keep these interactive buddies clean without causing a short circuit? It takes a bit of extra caution, that's for sure.
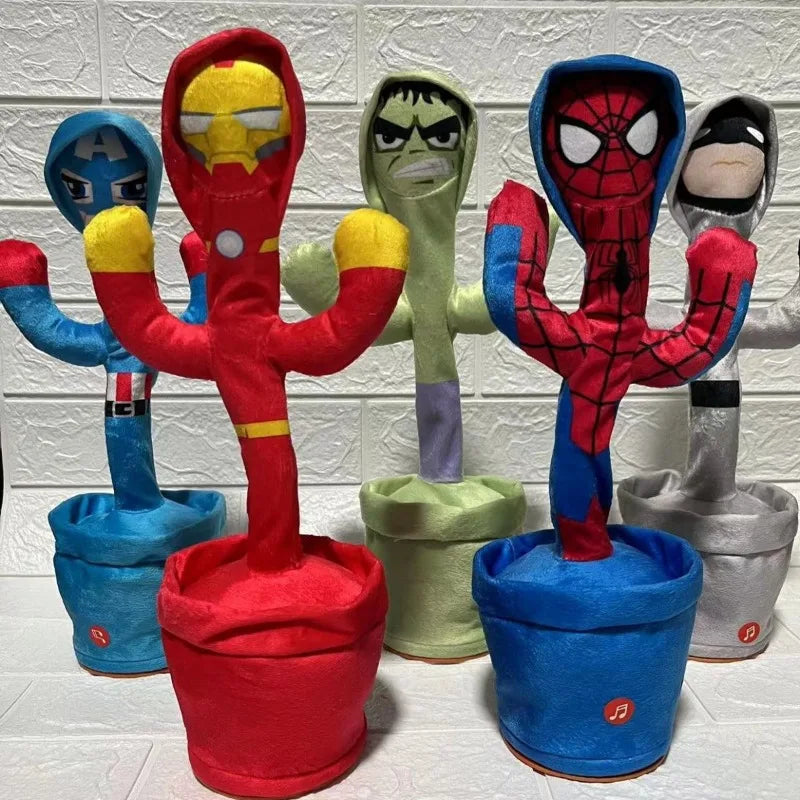
How do I clean my dancing cactus toy without breaking the electronics?
The absolute golden rule here is: NO SOAKING. Water and electronics are mortal enemies. So, submerging your dancing cactus or any plush with a battery pack or internal wiring is a big no-no. Your best bet is careful surface cleaning. First, if possible, remove the batteries. This is a good safety precaution and also protects the batteries themselves. Check for a battery compartment, often secured with a small screw. For the plush parts, use the spot cleaning method described earlier, but be even more cautious. Use a very lightly dampened cloth with a tiny bit of mild detergent (or even just plain water if the soiling isn't bad). Wring the cloth out thoroughly so it's barely moist. Gently wipe the surface of the plush, being extremely careful to avoid any areas where electronics are housed, like control buttons, speaker grills, or battery compartments. You do not want any moisture seeping into these areas. A soft brush can be used to gently dislodge dust and surface dirt. For crevices, a dry cotton swab or a soft, dry toothbrush can be helpful. If there are plastic parts, you can wipe them with a slightly damp cloth as well. If the plush is only lightly dusty, sometimes a good shake outdoors or a once-over with the brush attachment of your vacuum cleaner (on the lowest suction setting and held carefully) can be enough. If there's a stubborn spot near an electronic component that you absolutely must tackle, use the tiniest amount of cleaning solution on your cloth and work very carefully, ensuring no liquid gets near the sensitive parts. Dry the area thoroughly with a clean, dry cloth afterwards. For electronic plushies, prevention is also key. Try to keep them away from situations where they might get very dirty or sticky. If a major spill happens directly on or near the electronic components, and you're not comfortable, it might be time to consult a professional toy repair service that specializes in electronics, or if it’s a particularly precious item from your collection, consider the advice found when collecting plushies for all ages. It's always better to be safe than sorry when it comes to these interactive pals.
Preserving Memories: Long-Term Care for Classic Teddy Bears
Classic Cute Classic Teddy Bear Plush Toys needing preservation for longevity and other vintage treasures hold so many memories. To ensure they last for generations, or simply stay in beautiful condition for years to come, proper post-repair and ongoing care is super important. This also applies to well-loved farm animals for kids that endure countless tea parties and adventures. It’s not just about the big fixes; the little things you do regularly make a huge difference.

What's the best way to store my precious teddy bear to keep it looking good for years?
That's a fantastic question! Proper storage and regular, gentle maintenance are the secrets to plushie longevity. After any cleaning or repair, make sure your plushie is completely dry. Then, give its fur a gentle fluff with a soft brush – a baby brush works great – to restore its softness and original look. This is especially nice for teddy bears with longer fur. For regular upkeep, a light dusting every now and then can prevent dirt buildup. You can use a soft brush or the upholstery attachment of your vacuum on its lowest setting. If the plushie is just for display, this might be all it needs for a long time. When it comes to storage, especially for treasured items like vintage teddy bears, you want to protect them from a few key enemies: dust, moisture, pests, and direct sunlight. Avoid storing them in plastic bags long-term, as this can trap moisture and lead to mildew, plus some plastics can degrade and harm the fabric over time. Instead, consider a breathable cotton bag or an acid-free archival box if it's a very valuable antique. If you're displaying them on a shelf, try to keep them out of direct, harsh sunlight, as this can cause colors to fade significantly over the years. A spot with indirect light is much kinder. Also, think about the environment. Attics and basements can have extreme temperature fluctuations and humidity issues, which aren't ideal for plush fabrics and stuffing. A closet in a climate-controlled part of your house is a much better option for long-term storage. If you have a collection, try not to overcrowd them, as this can crush their shapes. Give them a little breathing room. Occasionally taking them out for a gentle fluff and airing can also be beneficial. These simple steps will help keep your classic teddy bears and other cherished plushies looking their best, preserving those precious memories for as long as possible.
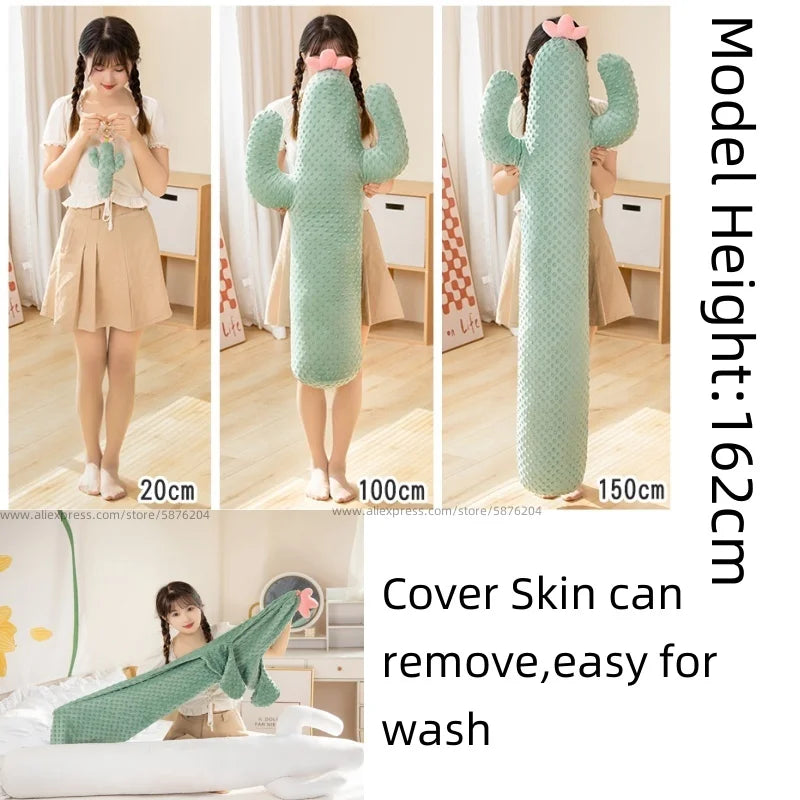
Calling in the Cavalry: When Professional Cleaning is Best for Your Stuffed Sea Animals and Large Plushies
We've talked a lot about DIY cleaning and repairs, and for many situations, these methods work brilliantly. But there are times when your beloved stuffed sea animals or even a massive Giant Cactus Throw Pillow might need more than you can provide at home. Knowing when to call in a professional plushie restorer can save your cherished companion from further damage and ensure it gets the expert care it deserves. This is particularly true for rare, antique, or incredibly sentimental items, maybe even some unique plant plushies that are hard to replace.
My beloved stuffed sea animals plush is too damaged for me to fix. Are there professional services?
Yes, there certainly are! Professional plush toy cleaning and restoration services, sometimes called "teddy bear hospitals" or similar names, specialize in handling these delicate and often complex cases. So, when should you consider them? If your plushie has extensive damage – multiple large tears, significant missing parts, or is extremely fragile due to age – a professional will have the skills and materials to perform more intricate repairs than might be possible for you at home. If the plush is a rare collectible or holds immense sentimental value, entrusting it to an expert minimizes the risk of accidental damage during a DIY attempt. They understand the history and significance of plushies and treat them with care. Professionals can offer a range of services. Some will remove contaminated or old stuffing, thoroughly sanitize the fabric inside and out, and then replace the stuffing with fresh, hypoallergenic fiberfill. They can expertly repair seams, reattach limbs, replace missing eyes or noses with period-appropriate or safe alternatives, and even undertake complex fur or fabric restoration. If your plushie has integral clothing that also needs cleaning or repair, they can often handle that too. For items that have suffered smoke damage, water damage, or pest infestation, professional cleaning is definitely the way to go, as they have specialized techniques to deal with these issues safely and effectively. Before choosing a service, do a bit of research. Look for reviews, ask to see examples of their work, and get a clear quote and timeline for the restoration. It's an investment, but for a truly irreplaceable friend, it can be well worth it to see them brought back to their former glory.
FAQ's
How often should I clean my plushies?
It really depends on how much they're handled and where they're kept. For well-loved plushies that get daily cuddles, a light surface clean every few weeks to a month is a good idea. For display plushies, a gentle dusting every month or two might be sufficient. Deep cleaning is usually only needed if they become heavily soiled or once every few years for a refresh.
Can I use a washing machine for any plushies?
Some sturdy, simply constructed plushies without electronics or delicate parts might tolerate a gentle machine wash. If you try this, use a delicate cycle, cold water, and mild detergent. Place the plushie in a mesh laundry bag or pillowcase for protection. However, always air dry thoroughly – never put a plushie in a hot dryer as it can melt fur or damage parts. Handwashing or spot cleaning is generally safer for most stuffed animals.
What's the best way to dry a plushie after washing?
Air drying is the best and safest method. Gently squeeze out excess water (don't wring!). You can roll the plush in a clean, absorbent towel to remove more moisture. Then, lay it flat on a clean towel or hang it in a well-ventilated area away from direct sunlight or heat. You can use a fan to speed up drying. Ensure it's completely dry before it goes back into play or storage to prevent mildew.
My plushie's fur is matted. How can I fix it?
For matted fur, a gentle brushing with a soft brush (like a baby brush or a pet slicker brush used very carefully) can help. Start at the tips of the fur and work your way down. If it's very matted, a light misting with water or a tiny bit of fabric conditioner diluted in water can sometimes help detangle, but test on a hidden spot first. For severe matting, the destuffing and washing method, followed by careful brushing while damp and again when dry, often yields the best results.
Is it safe to use bleach on plushies to remove tough stains?
Generally, no. Bleach is very harsh and can damage the fabric, fade colors, and even weaken the fibers of your plushie. It's much better to stick to mild detergents and patient spot cleaning. If a stain is really stubborn and you're considering something stronger, it's probably best to consult a professional plushie restorer.

